South Africa is a big predator country, with savanna, desert edges, wetlands, and even prairies of strange grasses. That gives you diversity, chasing sunrise silhouettes over the Kalahari one week, then documenting marsh herons in iSimangaliso the next.
But it also means shifting light, dust, heat, and equipment stress. Expect your sensor to collect grit, expect sudden storms, and expect to move fast from environment to environment.
Understanding light and animal behavior will keep you in the game, but having a resilient kit and a workflow that tolerates failure is what separates decent images from portfolio material.
Gear Foundations: What to Bring, What to Skip
You don’t need the most expensive gear, just reliable gear and backups.
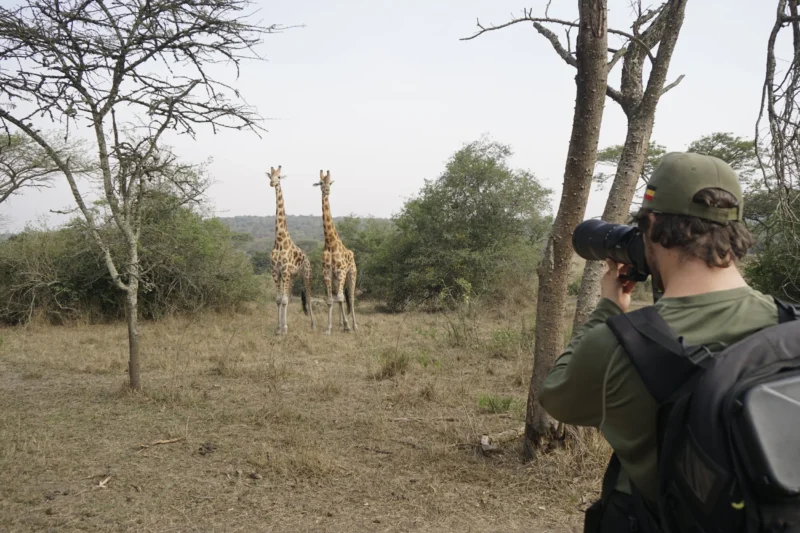
1. Camera Body and Lenses
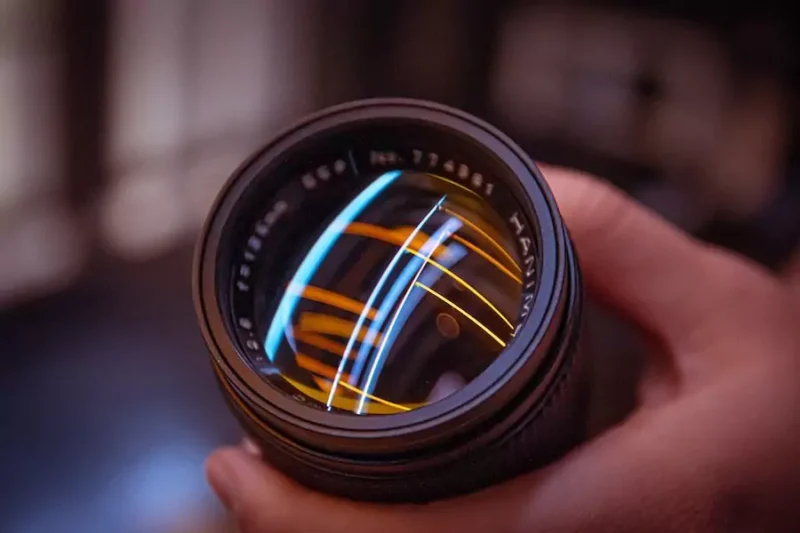
A mirrorless or DSLR with good autofocus, weather sealing, and burst shooting is ideal. A telephoto zoom (e.g., 100-400 mm or 200-600 mm) gives you flexibility; a prime (300 mm, 400 mm) gives you optical excellence. Also carry a wide-angle or mid-range lens (24–70 mm) for environmental portraits or scenes with animals in habitat.
Many wildlife photographers recommend dual bodies; if you can manage the weight, you don’t want to change lenses in the dust.
2. Support, Filters, and Protection
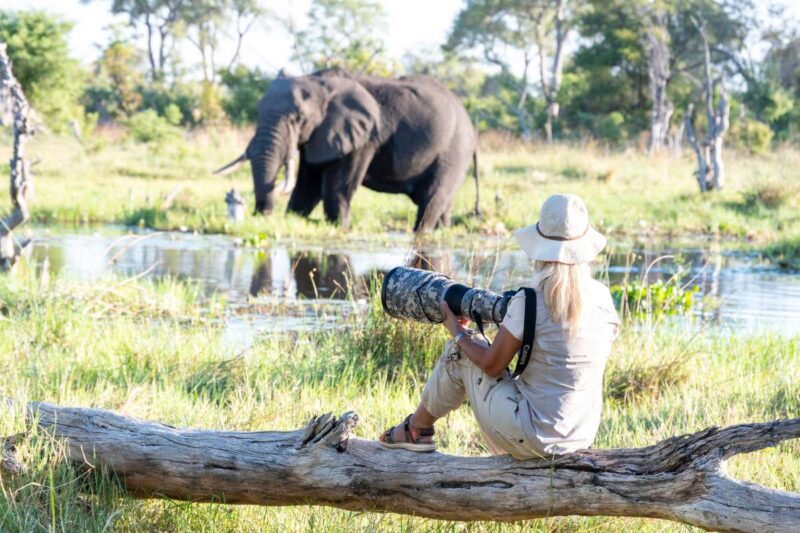
Handholding a 400–600 mm lens is brutal. Use a sturdy monopod or tripod, or a beanbag if shooting from a vehicle. In the back of a 4×4, the beam you clamp your head on becomes your support. Always carry a rain/dust cover for your camera.
Lens filters (UV, clear, and neutral density) can help in high-contrast light or to reduce glare. And for long safaris, bring extra memory cards, batteries, and a portable backup system (SSD or rugged SSD). Storage is one thing people get caught on.
3. Vehicle and Transport Gear
Your vehicle is your mobile basecamp and safety net. In South Africa’s mix of sand tracks, rocky paths, and sudden downpours, a dependable 4×4 is essential. Comfort matters, but durability and ground clearance matter more.
Trusted across African safaris, the Toyota Land Cruiser 70/79 is the benchmark for reliability. It carries heavy gear, handles rugged terrain with ease, and spare parts are available almost anywhere. Many safari operators modify these rigs with roof hatches, camera mounts, and dual battery systems, ideal for long photography trips.
If you prefer something lighter, the Toyota Hilux Double-Cab 4×4 offers excellent fuel efficiency and easier maneuvering, though with less load stability for heavy camera setups. Land Rover Defenders are capable alternatives, but they’re pricier to maintain in remote regions.
A well-equipped 4×4 with a secure storage setup and a Toyota truck bed cover will keep your equipment protected from dust, heat, and rain when you’re deep in the bush.
Your choice of transport cover, internal load layout, and mounting points will influence how much you can move while shooting.
Best Times and Locations to Shoot
South Africa’s seasons and reserves demand planning.
Seasonal Timing and Light Windows
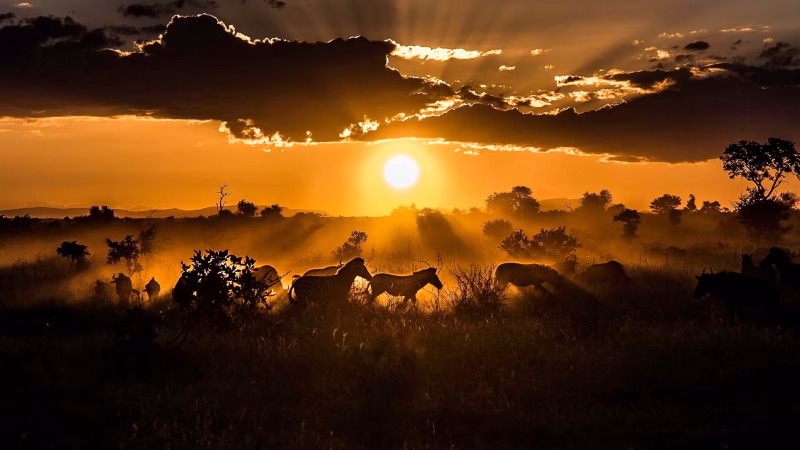
The dry season (May to September) is prime for game viewing: sparser foliage, animals congregating around water, fewer mosquitoes, clearer skies. But in the “green season” (November to March), the landscape is lush, dramatic storms happen, and births occur—so there’s potential for emotional, intimate moments, though light is trickier.
Every day gives you two magic windows: just after sunrise and just before sunset. That’s when shadows are long, light is warm, contrast is manageable, and animals are active. Midday mountains of shadow and heat haze will challenge you. Use those hours for scouting or backup tasks (charge batteries, manage data).
Top Reserves and Regions for Variety
- Kruger National Park & Private Reserves (Sabi Sands, Timbavati, Manyeleti) – staple big five, good infrastructure
- Kgalagadi Transfrontier Park – dramatic desert landscapes, predator behavior near scarce water
- iSimangaliso Wetland / St. Lucia – marshes, waterbirds, crocodiles
- Karoo & Namaqualand – for more arid landscapes, small mammals, and endemic species
- Eastern Cape & Addo Elephant – good for combining wildlife and coastal or forest scenes
The point: build your itinerary so you stack varied biomes, so you never waste a morning by being stuck in one type of terrain.
Field Techniques and Composition in Wildlife Context
Getting that perfect shot in South Africa’s wild is about patience, rhythm, and control. Crisp eyes, natural motion, and clean composition come from knowing when to wait and when to shoot.
1. Anticipate Behavior, Don’t Chase It
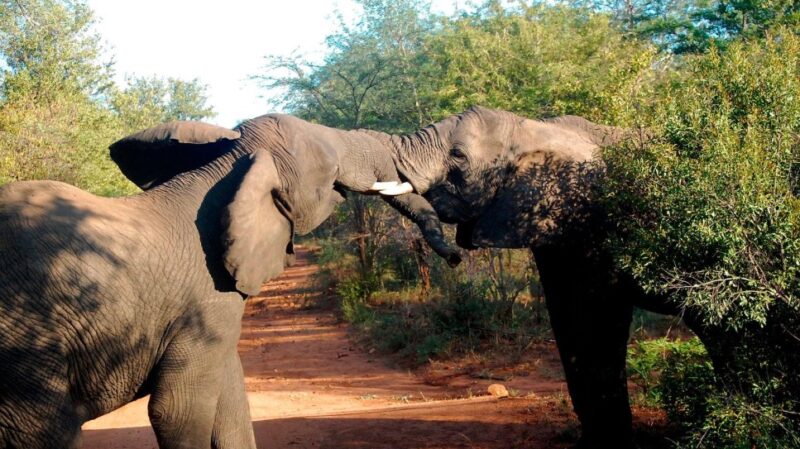
The best photographers predict moments before they unfold. Study animal routines: lions sleep through midday, elephants gather at waterholes, and birds of prey circle with the wind before diving. Spend time observing, not reacting: every pattern you notice shortens the gap between instinct and the shutter click.
2. Composition and Framing
Framing gives emotion to a photo, not just balance. Start with the rule of thirds, but break it when the scene demands symmetry or drama.
- Leave negative space in front of a moving animal; it adds breath to the image.
- Use branches, grasses, or shadows as foreground layers to draw depth.
- In early morning or dusk, silhouettes against orange skies create a striking mood.
- For action, try panning; a slow shutter with a sharp subject delivers a sense of motion no static frame can match.
3. Light and Exposure Strategies
Light in the bush changes by the minute. You’ll face glare, dust haze, and sudden cloud cover, all within one scene.
- Switch to spot or partial metering to prioritize your subject over the sky.
- Use a touch of exposure compensation when the backlight hides detail.
- In extreme contrast, bracket a few frames or blend gently in post.
- Keep fill flash minimal; it should lift shadows, not erase the wild mood.
4. Staying Steady and Sharp
A long lens magnifies not just distance, but every tremor. Stability is as vital as focus.
- Use continuous autofocus (AF-C) and burst mode to track behavior.
- Keep shutter speeds at 1/1000 s or faster for movement.
- Rest heavy lenses on a beanbag, monopod, or vehicle rail, and switch off stabilization when the camera is fully supported.
When technique and instinct merge, your frame captures more than wildlife — it holds the quiet seconds between stillness and motion, the essence of the South African wild.
Workflow and Post-Processing in Remote Areas
Your job doesn’t end in the field; how you handle your data, color, and editing matters.
Data Management and Backups
Every evening, offload your cards to a laptop or rugged SSD, and keep a duplicate in a separate bag. Format only after you confirm backup. Use checksum or hashing tools if possible to confirm file integrity.
Editing Strategy: Raw, Cull, Develop
- Cull ruthlessly, don’t carry every shot into development.
- Work in RAW for maximum latitude.
- Start with global adjustments (white balance, exposure), then local tweaks (shadows, highlights, detail).
- Don’t overdo sharpening or noise reduction; preserve natural texture.
- Use color grading to give mood, perhaps cooler tones in mornings, warm tones at dusk.
Final Thoughts
Wildlife photography in South Africa is a balancing act: technical rigor, patience, adaptability to the environment, and creative vision. Over time, your instincts sharpen. You’ll begin to frame before you raise the camera. You’ll feel when light changes, when predators shift posture, when the moment is near.
Track your progress: catalog your “keeper rate,” see which settings combinations yielded your strongest images, and evolve your personal style. Share your work in forums or with guides to get feedback (but filter based on your taste).
Above all: be humble in the wild. You’re a visitor. The wild doesn’t owe you a shot. But with preparation, respect, and grit, you’ll bring home images that reflect not just animals, but the light, texture, struggle, peace, and edge of South Africa.